Sunday 30 June 2013

The perfect workshop....

I've been following woodworking blogs for a number of years now and every so often, very predictably, the subject of workshops and their set up / layout crops up. I've particularly enjoyed some of Peter Follansbee's posts about seventeenth century carpenters workshops and benches and love some of the original illustrations going back to medieval workshops.

I happened to come a cross a set of books in a charity shop that I thought Ju's little boy would love as its about a boy who helps his dad who is a carpenter in an old-fashioned Apalachian type homestead- nicely illustrated stories by a well know American kids' author. The books are called Will and Pa and not only do I love the pictures of Pa who always has a pencil behind his ear, tools protruding from his pockets and leaves a trail of screws and nails wherever he goes, but the picture on the inside cover of each of the books, that shows Pa's workshop, is just wonderful - I want it, it's the perfect workshop.


I just love the detail in this picture, all the tools, the hardware and shavings. It has been incredibly well researched.

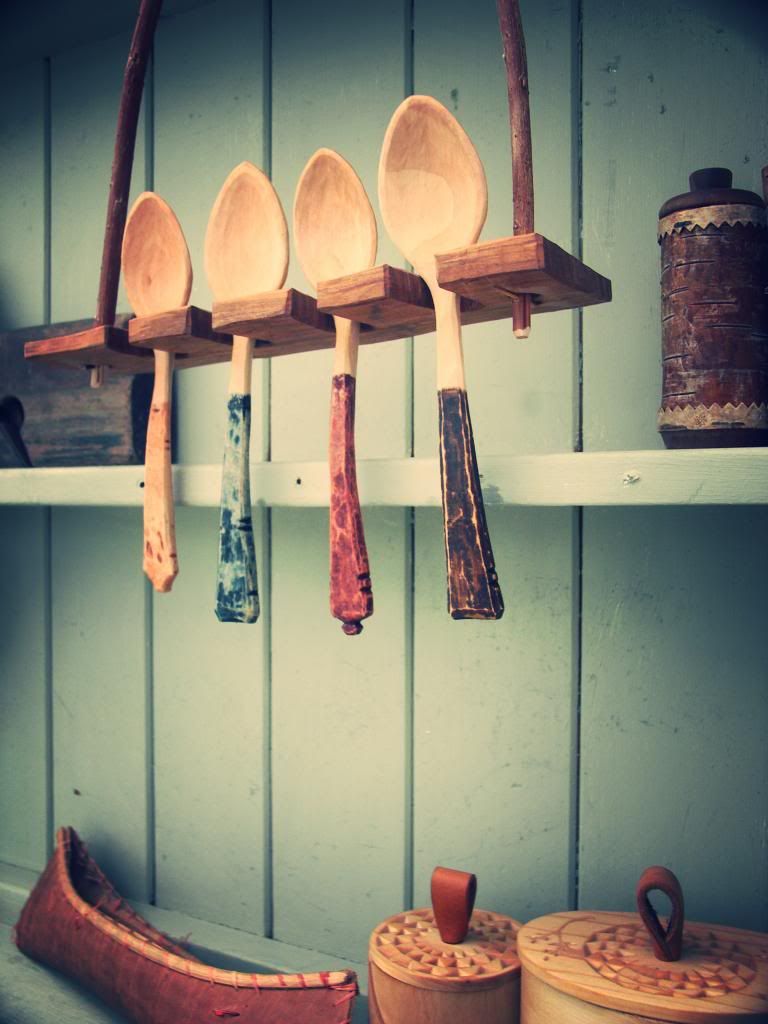
 On an entirely different note, I have had a number of spoons sat in oil for a couple of weeks, then hung them to drip dry and was just thinking how great they look. I use wallnut oil and it seems to give the spoons a really nice glazed look. I don't think you can see it too well in the pictures, but on the darker, laburnum spoon, I think you can see what I mean - you could be forgiven for thinking they'd been varnished. I know they look wet, but they are actually not.


Tuesday 25 June 2013

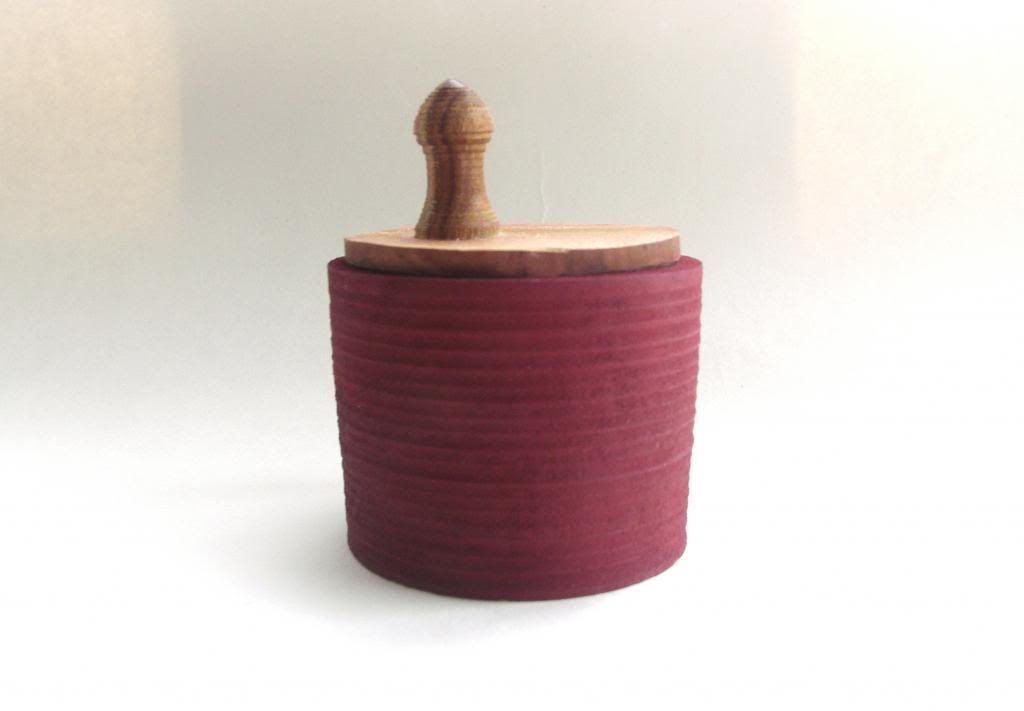
Turned Box


Just a quick post of a box I made recently. The style is copied from a box I saw on Jim Sannerud's website. If you haven't already seen his website, then check it out, he is inspirational.
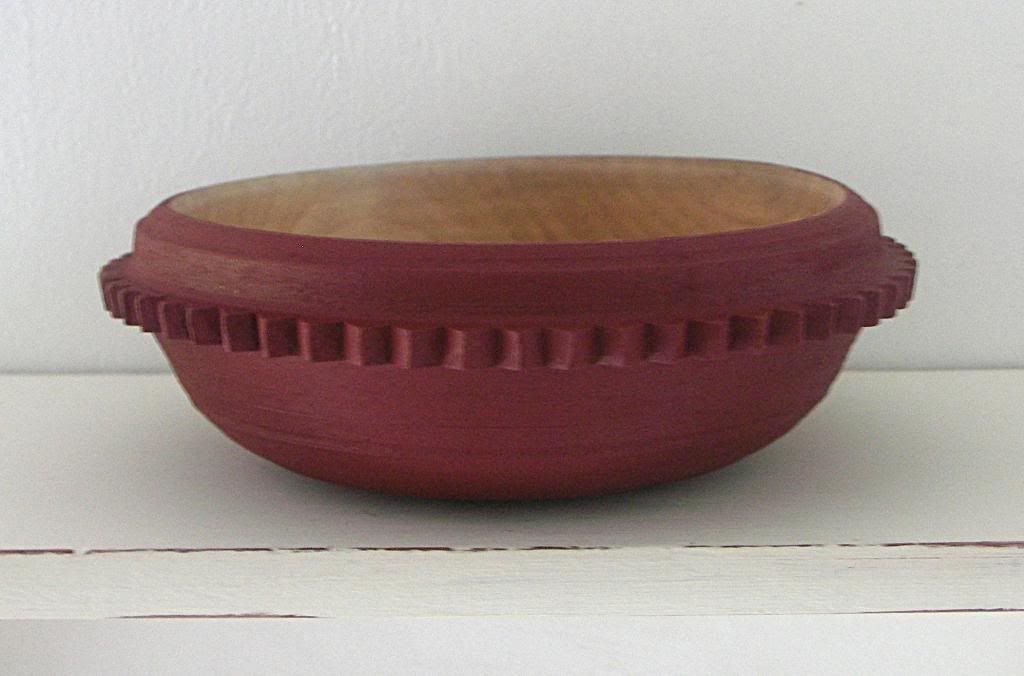
I also decided to paint the cog bowl I made recently. I think this will look great when the paint starts to wear.


Friday 21 June 2013

Wooden Shelf


For quite a while now my wife Laura has been making a little bit of extra money during her maternity leave,  selling things that she has made, refurbished or up cycled. She was recently approached by ITV to provide some stuff for a make over show and this has encouraged her to take things a bit more seriously and create her own website/blog. She's still working on it, but you can check it out here. I've recently taken a bit of an interest in doing some regular carpentry/joinery. This interest has largely been kindled by the discovery of Lost Art Press. So when Laura asked me to make a shelf for her to sell I decided that it would be a good bit of practice. It's very basic and by no means perfect, but I really learned a lot. Attaching the shelf to the vertical slats even gave me a chance to try a dovetail joint. I've got a long way to go.

Tuesday 18 June 2013

Laburnum Spoon


I've never carved laburnum before, but it made a nice change from the lighter birch and sycamore that I've been using recently. The grain in it is beautiful, but I actually found it to be a bit distracting, making the lines harder to follow. It's a shame that I couldn't leave a bit more of the sapwood in. I've been thinking about photography recently and so I thought I'd have a bit of a play with something different to the obligatory spoon on a stump.


Sunday 16 June 2013

In good company.....

You will often find me, when out in the garden hewing, axing and carving, or in the shed turning or drilling, wearing a shirt and tie - an outfit generally considered wholly inappropriate for this kind of work.


It is not my work outfit of choice, you understand, but because I wear a shirt and tie all week for school and a suit for church on Sundays, I often can't be bothered to waste time getting changed into scruffs when I'm keen to get on with one job or another. I was very pleased (an vindicated), however, when I came across some photos and footage of some old-time bodgers who were all wearing formal trousers, shirts (some ties) and waistcoats - a very suave look, I think.

It hadn't skipped my attention, having said that, how Sean Hellman always wears a blazer type jacket when doing his woodwork - come on the rest of you, you're letting the side down!

It was nice to spend a little time in the garden today - the weather was good so I took the opportunity to sharpen my knife and hook.

Not only is it good practice to keep your tools sharp, but Julian happened to comment yesterday that he thought I needed a new spoon knife - a finishing knife - so that I can get a better finish on the bowls of my spoons. I agree whole-heartedly, the only problem is that I also need a chip carving knife (though that's more of a 'want' than a 'need' and a new axe - which alone is going to cost me at least £100, so a new spoon knife is going to have to wait. I know what Ju is saying, though, and I perhaps think it's time to get out the scrappers he gave me about a year ago to see if they can help with the finish of my spoons.

Thursday 13 June 2013

New tools


Going to a car boot sale on a Saturday morning has become a bit of a tradition in our family. They've been a bit unfruitful recently, but my dilligence paid off last Saturday when I pick up this old mortice chisel for £5. I've been looking for one like this for a while now after seeing them used by Peter Follansbee in his wonderful book Make a Joint Stool from a Tree. It's in fantastic condition and though it's clearly quite old, it looks like it's seen very little use.


I also decided to sharpen up an old drawknife that I picked up at a marche en puce  (flea market) in France last year. It needed quite a bit of work, so I did some initial grinding on a belt sander and then finished off with oilstones. In the past when sharpening drawknives I've raised the stone up in a vice in order to give clearance for the handles, but this time I thought I'd try something different. I clamped the drawknife between my left hand and my chest (a bit like holding a violin) and then moving the stone along the edge. This worked really well for me and as long as you use big enough stones, then I think that it's quite a safe way of doing it.


Another tool I've been playing with recently is my camera. I used to be quite in to photography and still have quite a large collection of cameras. Not what you would call proper cameras, but quirky, vintage  and instant cameras such as Lomo cameras, Holga, Diana, Polaroid etc. Unfortunately processing film has become quite expensive so I haven't used any of them for sometime. However the kind of effects that you get with these cameras seems to be quite fashionable and so there is quite a lot of photo editing software available that will allow you to achieve similar effects. For me it doesn't quite have the charm of the real thing, but it's fun to play with anyway.

Sunday 9 June 2013

Harry Potter and the incredibly expensive merchandise

Next week I will be leading a school trip to 'The Making of Harry Potter' Warner Studios Tour in London, with 150 Year 6 kids (10 years old), so thought I should go this weekend so that I know what to expect and what's in store for my pupils. I got two free teacher tickets so didn't have to pay for my wife and me, but just for my 3 kids it cost me £72. I thought this a little expensive at first and thought it would have to be something really quite special to justify that kind of out-lay. And it was - what an amazing place for a Harry Potter fan - which I hasten to add that My wife and kids are.

Not wishing to give Warner Studios free advertising, but I do believe in fairness, and it would only be fair for me to say that we thoroughly enjoyed it and the skill and artistry in those who produced the sets, props, animatronics and everything else that made the films as good as they are, was breath-taking. Well worth a visit - something for GB to be proud of.

Of course, one of the exhibits that most caught my eye was the wooden carving of the Goblet of Fire. I'd seen this particular film numerous times and had never noticed that the actual goblet was wooden.
The goblet as seen in the film
 
Original design drawing for the goblet

The finished goblet, all carved from a single piece of wood

Close-up of the runes detail round the rim - all very nice, tool marks left on
If there is one down-side to the whole Harry Potter world experience, it's the extortionately expensive gift shop through which you have to exit - employing the same organizational techniques as those supermarkets who place all the chocolate and sweets right next to the check-out where your young kids are guaranteed to see and want them (as if we couldn't have just found the sweets ourselves in the sweets aisle, if we'd wanted them).

Suffice it to say, my young, gulible and easily marketed son found it impossible to walk through the shop without expressing his absolute 'need' for one of the mass produced, resin wands that cost £25, despite me warning him before hand that due to his 'need' for a new Pokemon game earlier in the week that we wouldn't be buying one. In fairness, whilst I must admit that the majority of the purchases available in the shop are quite nice, the prices are riddiculous.

Of course, I responded to my son's distress in the way that any DIY skinflint would with the dreaded, imortal words, "I could make one of those." What I didn't take into consideration was that having once said so, my son was not going to let it drop until I'd actually made one. So.....
This is Jude's preferred wand - The Elder Wand - £25 worth, apparently

This afternon I cleared a bit of space in my shed (enough for me to stand in), found a piece of seasoned wood on the log pile, fixed it into the lathe and set about turning an Elder Wand. Which was going well until I caught the gouge on a crack in the wood and it broke and flew off the lathe.

First attempt, before it flew off the lathe - I told Jude it was due to the amount of magic we were harnessing
At least I now know it can be done, and am going to try again tomorrow (no doubt), using a cheap rolling pin to see if that works any better. Fingers crossed, please, and repeat after me, "I do believe, I do believe, I do!"

Lots of Wood


Some of you may already subscribe to Jarrod Stonedahl's blog (if you don't, you should) and if you do then you will have seen the excellent video he put up recently showing how he axes out a spoon blank. I watched it on Thursday evening and by Friday afternoon I was really looking forward to going home and trying out some of the technique that he displays. The sun was shining and everything was looking good for an evenings carving. I only wished that I had some nice green wood to work with. I couldn't believe my luck when on my walk home I passed a tree surgeon who was taking down some sycamore. As an amateur greenwood worker  I don't have a regular source of material so this was a real find and I have enough for a score of bowls, and spoons galore. I couldn't wait to get some on the lathe and so spoons were out of the picture Friday night and I turned this bowl instead.


I was surprised at how long it took to carve the cut out decoration, but I'm happy with the result. I'm very grateful for my new supply of wood, but sycamore is a bit boring (plain and a bit grey) so this will end up getting painted.

Sunday 2 June 2013

Grandad's Tool chest


Recently (after much nagging) my dad gave me his father's tool chest. This now sits in pride of place at the centre of my workshop (garage) and is a regular reminder of one of my woodworking heroes, Stanley Heath. I think I mentioned my maternal grandad, Arthur Banham, in a previous post. Arthur was a woodworker by trade, but Stanley was very much a shed woodworker and though I aspire to be more, I guess that is what I can relate to most. I remember a few things that Stanley made; a card table, a bird feeding table and a toy castle that he built for my nephew (his first grandchild). I've also seen photographs of other things like a toy garage and a doll's cot. My Dad tells me that he would see something in a shop and then go home, go to his shed and a few hours later he would emerge with his interpretation of what he'd seen. Aside from the skill involved that's an attitude I really admire and try to emulate.

Unfortunately the tools that came with it weren't really up to much. there weren't many of his original tools and those that had belonged to Stanley had seen better days. It's interesting though to look at the different slots and spaces and try to work out what once went where (say that ten times as fast as you can), because of my own interest in woodworking it gives me a great sense of connection to him. I wish that I could talk to him and ask about it, but I guess this is the closest I can get.